
Short Form Projects
The basic steps to start up the core system are:
- Create the account on the manuonline.com web site.
- You will receive by email the first user name and temporary password.
- Login and change the password.
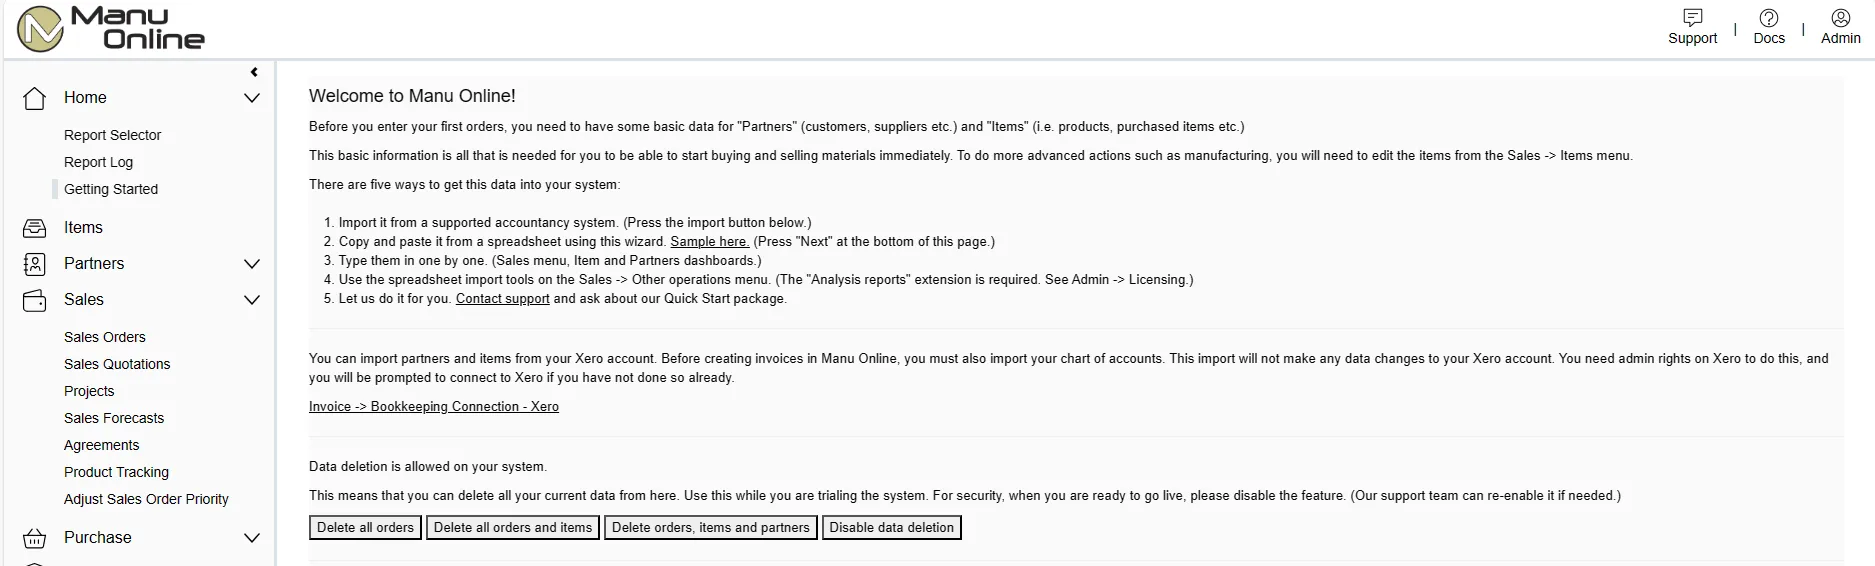
- Optionally use the start-up wizard to copy item and partner master data from your Excel spreadsheets or previous system. If you don't copy your previous data you can create partners and items as you need them.
- Optionally edit the company data with your own commercial terms etc. if you do not want to use the default values.
- Start using the system, either from sales orders or purchase orders.
Despite the simplicity of the above, consider ordering personal online training to help you go through these things.
Short form projects are suitable for small organisations with at least one person with reasonable experience of business systems. They can be carried out in a number of days providing that existing data is of good quality, or if no legacy data is going to be transferred to the system.
The short form project is in essence a check list. The following check list can be used for implementing Manu Online. Note that there are extra steps if you are also implementing multistep routing.
Typical stages in an implementation project are as follows. The time taken to be up and running with Manu Online varies depending on many factors such as the current state of the manufacturing management and the amount of commitment from staff. Typical implementations are between 3 weeks and 4 months.
Steps for short form projects
- Open the account. The account for the starter version can be created at no cost from the web site.
- Initial familiarisation. Familiarise yourself with the features of Manu Online as described in this document and other materials.
- Compare how your own organisation works to the concepts of Manu Online, and what benefits could be obtained.
- Evaluate tangible objectives such as "increase control with our subcontractors" or "give our customers order tracking from our web site".
- Evaluate which version of Manu Online would be suitable and which modules would be needed.
- License the necessary modules.
- Prototype training package. Consider ordering a few consultancy sessions from one of our consultants. We can provide consultancy, training, data migration and support services in a package designed for your requirements. The objective is to get the core system installed with minimum effort and cost.
- Prototyping, process documentation and verification. Identify your business processes and enter trial orders to follow these. Evaluate different ways of using the system and decide on the best. Make simple process documentation that specifies how Manu Online is used in your organisation. Verify that your usage gives the results you expect.
- Optional process changes or system development. If prototyping shows the process and system do not match, consider modifying either the business processes or evaluating extensions to the system.
- All-personnel training and system piloting. Take a few sample orders through the whole cycle and involve all people. Usually it is impractical to run both the old and new system simultaneously, so the new system is run only with selected orders without regard to maintaining inventory quantities.
- Data transfer and start-up. At start-up, the final data transfer can be made from your previous system. Data transfer can most easily be made using standard Excel templates which can be uploaded directly to the system.
- Follow-up review. After the system has been in use for a short period, make a formal review of the success of the implementation and identify any future developments required.
Check list for a short form project
Having first logged in to the system and changed your password, follow this check list to set up the system. In general it is possible to skip steps and return to them later as needed.
| # | Step | Manu Online |
|---|---|---|
| 1 | Create any other users. The number of users is unlimited and does not affect your license fee. Set their user rights appropriately. In general, give each user the "Management" right that allows users to see each other's work. | Admin → Users |
| 2 | Check and enter your settings for the various drop-down lists used throughout the system. The system is created with default values, but it is recommended to edit or add the values you use: payment terms (e.g. "30 days net"), delivery terms (e.g. "EXW"), delivery methods (e.g. "Express post"). If you import or export, mark only the countries you actually need as "Is in use". If you use foreign currencies, add them and set their rates. Enter values for item families 1, 2 and 3 to filter and group your list of items. | Admin → System settings → System settings tab |
| 3 | If you are using an external linked accountancy program (e.g. Xero or Sage One), import the chart of accounts. This must be done before creating any invoices. After import, accounts will be automatically marked for sales, purchase, receivables, payables, and VAT sales/purchasing where relevant. | Invoicing → Bookkeeping connection → Bookkeeping export |
| 4 | Create or import your partners (i.e. customers and suppliers). | Sales → Partners → New, or Admin → Start-up wizard |
| 5 | Create or import your material items. Each item needs a unique id which can be numeric or alphanumeric. If you do not have item ids the system will default to a sequential number. | Sales → Items → New, or Admin → Start-up wizard, or Warehouse → Other operations → Data transfer |
| 6 | Add product structure (a.k.a. bill of materials) to your manufactured items. | Sales → Items → open the item → Plan for manufacturing → Manufacturing tab |
Additional steps if using multistep routing
Prior to adding data for manufacturing items, carry out these additional steps. Loading can be measured on either a "per work/machine item" basis or a "per cell" basis. Cells should primarily be used for tracking work flow. Manufacturing cost codes can be used to measure what work has been done without the need to create work items or cells for particular simple operations. When in doubt keep it simple in the first implementation.
| # | Step | Manu Online |
|---|---|---|
| 1 | Enter the time unit you wish to use, called the "period", and the normal length of a working day. For instance, "minutes" per item with 480 periods per day for an 8-hour day. | Admin → System settings → System settings tab |
| 2 | Create manufacturing cost codes (if you plan to record work times). These codes are optional, but allow you to record what people have been doing inside a work order. | Admin → System settings → System settings tab |
| 3 | Specify your work cells. Create work cells according to the design of your factory. Work cells are typically physical areas in your factory for which you wish to monitor the flow of work orders and view loading and perhaps capacity. | Production → Factory setup → Work cells |
| 4 | Create route templates. Each step of a route must be on a cell. To have a properly defined route, ensure that each step is referred to by a previous step or is a start step. Specify the "Ready on day" number as the typical throughput days for products using this route. | Production → Factory setup → Routes |
| 5 | Create items for work and machine time. Decide the different work and machine time items needed and create them. Specify the standard cost per period — this is used in work orders to calculate manufacturing cost. It is recommended to create as few work items as possible. | Sales → Items → New |
| 6 | Update cells with work and machine time capacity. Capacity is set by specifying the start date, periods per day, days per week and a multiple. This is optional — without capacity figures you can still see loading. | Production → Factory setup → Work cells |
| 7 | Update product structures with work and machine time items. Include the items in the manual creation or import. Remember to specify the correct step for each. | Sales → Items |
| 8 | Create a list of operators (a.k.a. employees, workers). Work time recording is done by operator so that computers can be shared inside a work area. Specify a unique ID for the operator (used if barcoding is in use), and optionally a PIN number for clocking in and out. | Admin → System settings → System settings tab → Operators |
After completing this initial setup, you can start creating sales orders and using the system. Remember that while the system is in "demo mode" it is possible to empty it of all orders (from Admin → Start-up wizard) so that it is possible to practice order entry.