
Private apps
To create a private app you will need programming skills and a programming environment suitable for creating internet-based RESTful application calls. The Manu Online API uses the industry-standard OAuth2 for authentication. You will need to be familiar with the concepts of OAuth2 to successfully create a program.
We support Swagger API documentation. You can browse and try out our API with your own data by going to https://api.manuonline.com/swagger/ui/index. You do not need a private app to browse our Swagger pages, but you do need a user with API rights and the Public Integrations extension licensed in your system.
It is also possible to create webhooks. These are used to trigger actions in your application as a result of a Manu Online user doing something in the system, for instance saving partner data or activating a sales order. Webhooks are associated with private apps for security reasons. Even if you only use webhooks, you will still need to register a private app — even if you don't create code for it.
IMPORTANT: the various API keys and logins issued as part of private apps will allow a developer to gain access to read and modify your corporate data. Treat keys as confidential information. Store them securely and do not send them by unsecured email.
Licensing
To use private apps, you need to license the "Private apps (API)" extension. Depending on the Edition of Manu Online that you are using and our current pricing policies, this extension may or may not be charged for, or you may need to upgrade your Manu Online account to access it.
How to create (i.e. register) a private app
- Check that your account's licence has the licence for "Private apps (API)".
- Create a user and give the user API rights according to minimum rights. You will need a unique email for this. Alternatively, give the rights to an existing user (but this is not recommended).
- Go to Admin – Integrations – Private apps and the API.
- Create a new app record. The app's status will first be set to pending.
- Contact Manu Online support via the "Contact us" form on our web site or email support@manuonline.com to get your app enabled.
- When it is enabled, go back to the app listing on the Integrations screen and click Edit to see the full details and OAuth2 parameters. Fill in the needed parameters and pick up the client id and secret. (See below for more details.)
- Code your own application using your choice of programming language.
Setting and retrieving your OAuth2 parameters
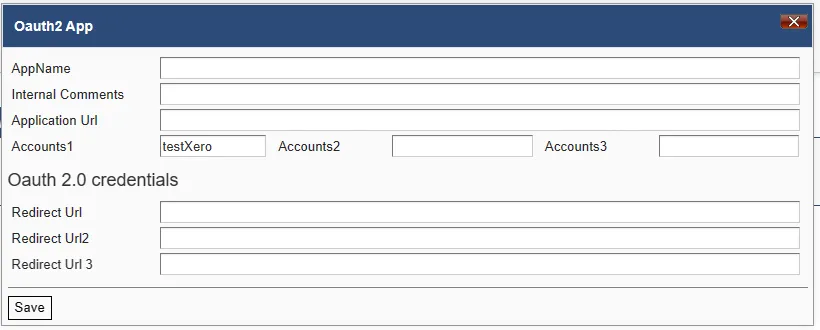
Once your app has been approved, the keys will be available. Go back to the Private Apps screen and click the Edit button next to your app.
- Internal comments and Application URL are for your own information.
- Set one, two or three Manu Online accounts that can be used by this app. The account ID can be seen from the Integrations screen.
- Set one, two or three approved redirect URLs for the OAuth process.
- Copy your client id and secret to your own code in a secure manner. Press the Regenerate button to get a visible client secret. The second secret is optional so that you can run your app for the time it takes to regenerate a key — but note that webhooks client verification is based on the first key only.
Implementing OAuth2
In addition to the redirect URLs and client credentials above, you will need to use the following OAuth2 settings. You will need to code the logic of getting and refreshing the tokens. We follow industry standards for OAuth2. There are a lot of public resources and training materials for OAuth2 on the internet. One example would be oauth.com.
- Authorization URL
- https://auth.manuonline.com/oauth/authorize
- Access token request
- https://auth.manuonline.com/oauth/token
- Refresh token request
- https://auth.manuonline.com/oauth/token
Access tokens are valid for 30 minutes. Refresh tokens are valid for two years.
In summary the process is as follows:
-
The app code should redirect the user to the Manu Online authentication server with the
following URL (replace placeholders
{clientid},{redirect_uri}and{scopes}with real values). Multiple scopes can be included in a comma-delimited list. The list of valid scopes can be seen from the user screen.
https://auth.manuonline.com/oauth/authorize?response_type=code&client_id={clientid}&redirect_uri={redirect_uri}&scope={scopes} -
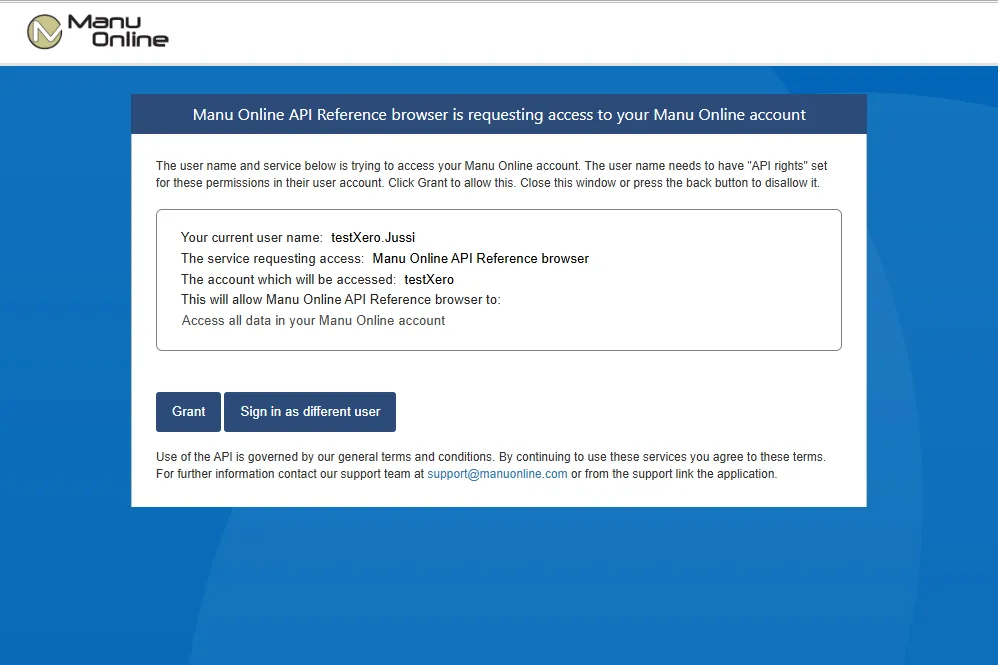
The user will be prompted to enter their Manu Online username and password. After
successfully authenticating, the user presses the Grant button and is redirected back to
their
redirect_uriwith an authorisation code. The client id, key and redirect URL must match the app settings. The user must also have rights to the requested scopes on their account. -
The application code needs to contact the authentication server with the authorisation
code,
client_idandclient_secret(URL and form data supported) to obtain an access token and a refresh token. The validity time of an access token is 30 minutes, and of a refresh token 2 years (730 days). To persist the connection over a longer period of time, the refresh token needs to be stored securely by the app. At the expiry of the refresh token, the user will need to log in to renew it (put it in your calendar!). -
Include the access token in calls to the API as the
Authorizationheader with the word "Bearer " prefixed. - When the access token expires (after 30 minutes) or becomes invalid, use the refresh process to get another access token. This would normally be done without user intervention. The app's id and secret are needed to refresh the access token.
Security recommendations
- If you are not using the API, keep the licences for both Private App and Public Integrations switched off in your Licensing section.
- Create and use a separate user name in each application that you create. Use a strong password for the user account.
- Apply minimum user rights for the logic of your app. Apply minimum user rights for Manu Online for these users, e.g. Partner read-only.
- Do not store or transmit your client secrets in an insecure manner.
- Regenerate your client secret if there is a risk that it has been compromised.
- Note that IP filtering of the user account does not apply to API users.
Setting user rights for the API
- Create a new user (recommended, although you can give rights to an existing user).
- Go to Admin – Users and select the user.
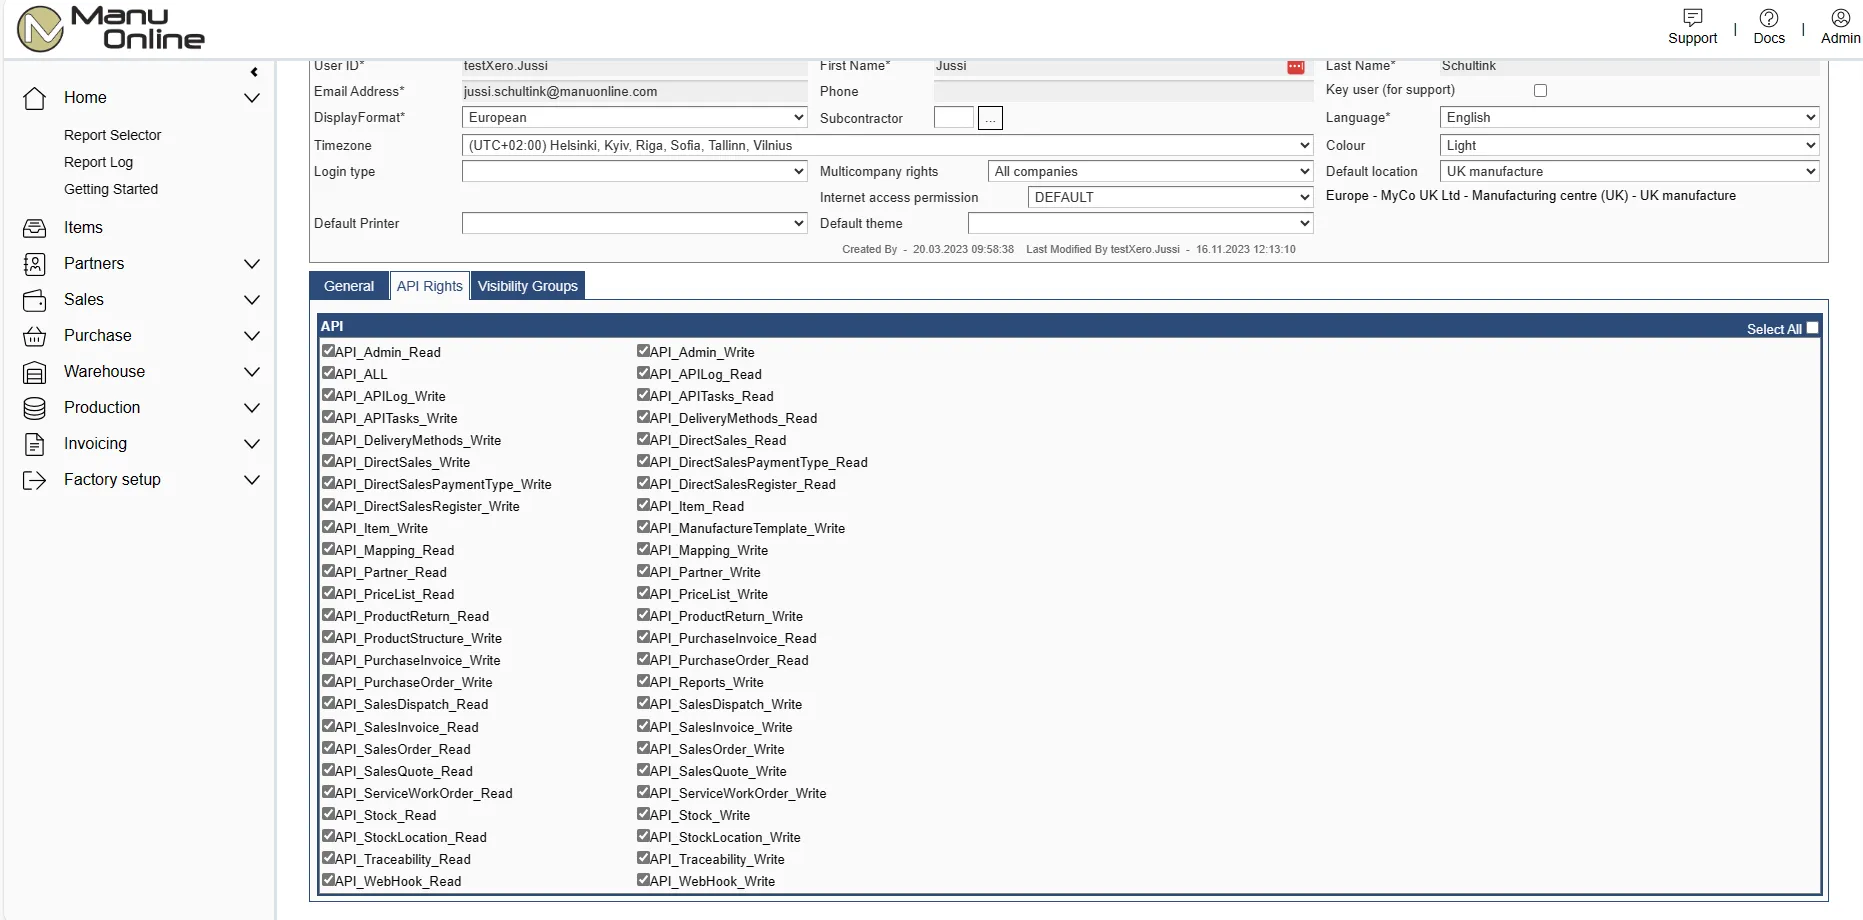
-
On the API tab select the appropriate rights that your app will need. For all rights you
can use the
API_Allright by itself. In OAuth2 terminology these are also referred to as "Scopes". - Save the screen.
Testing your user with the API documentation
- Ensure that you have "Public integrations" licensed on your system. (By removing the licence to public integrations you can prevent access to all users of your account.)
- Go to api.manuonline.com/swagger/ui/index to see the testable documentation. Note that this page needs a "modern" browser; legacy Internet Explorer is not supported.
- Optionally enter one or a comma-delimited list of scopes.
- Press "Connect". You will get a screen to enter your username and password. If you have access to more than one Manu Online account, you will be prompted to choose the appropriate account. On successful authentication you will be asked to "Grant" access to the account indicated. The popup window will close.
-
Choose an endpoint and press "Try it out!". Data should be returned. The endpoint
/meis a good place to test — it will just return your authenticated username. You will also see the curl code that can be used.
Testing the API interface with the Postman utility
Postman is a utility that is widely used in the industry for working with APIs. Their smallest version is available for free.
Follow Postman's instructions to set up a new endpoint. Select OAuth2 as the authentication method. Copy the Postman Callback URL back to your app settings in Manu Online.
This is how the OAuth2 set-up screen looks for Manu Online in the Postman API test utility:
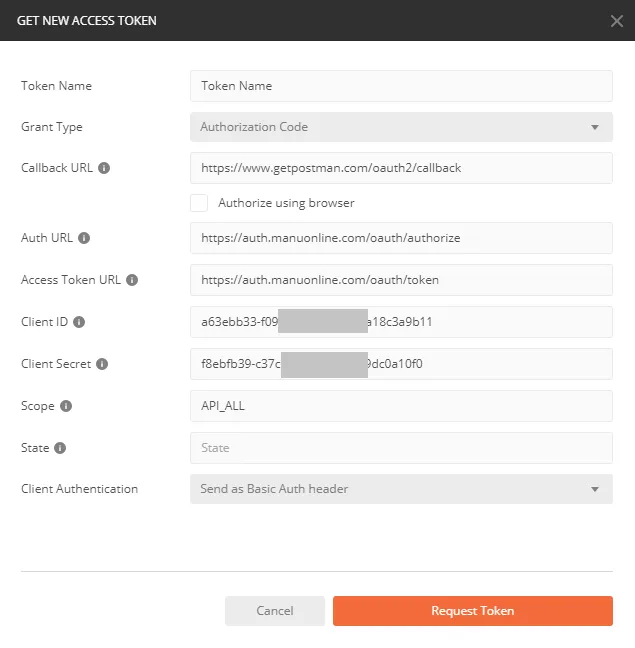
Notice that the Manu API allows only the "authorization code" grant type.
After you request the token, you can see that Postman has received the refresh token and used it to get the access token:
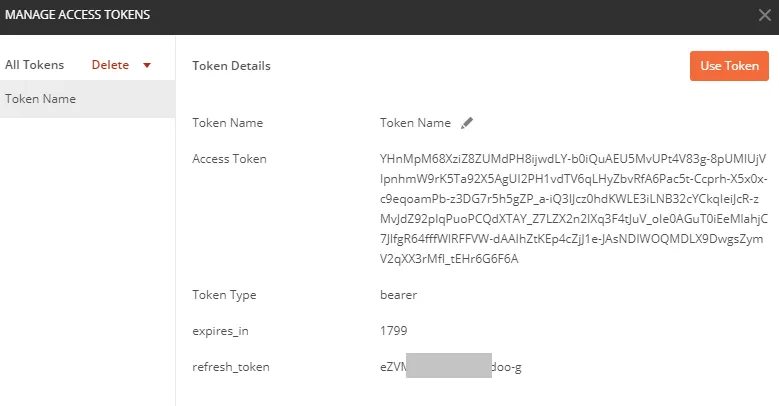
When sending a refresh token, notice that it is valid for only one access token retrieval. When receiving the access token, the Manu API also returns a new refresh token. Store the new refresh token for the next access token retrieval.
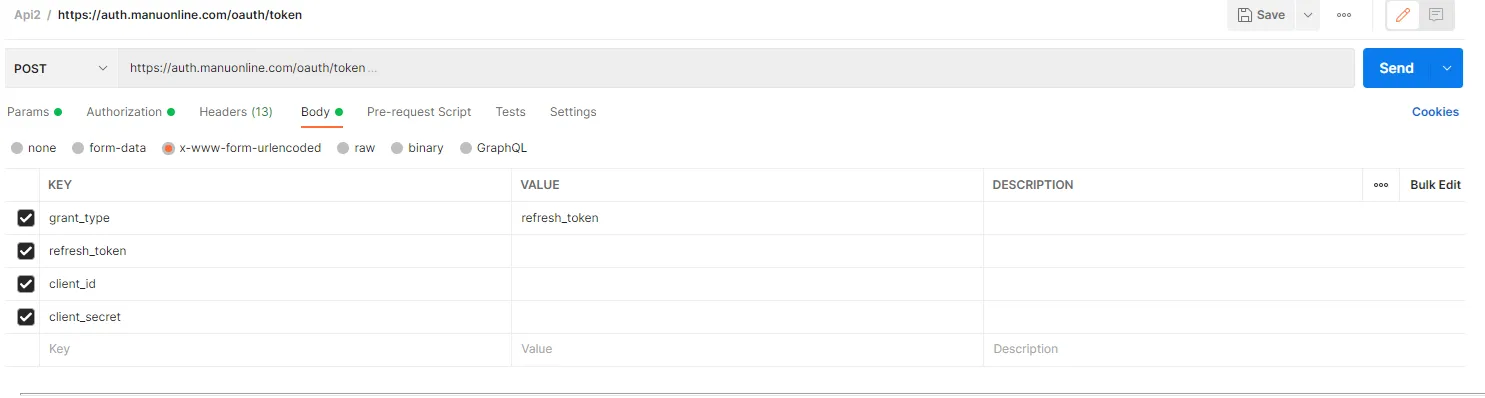
The refresh token is sent in this way:
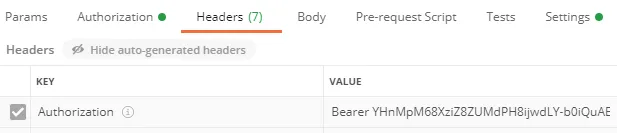
Here you can see the access token in Postman's header:
Webhooks
Webhooks are data transfers triggered by an action by a user in Manu Online. They send data out from the system to the address specified. The server on the receiving end is often called the "listener". While it is also possible to "get" data from your Manu Online account by using the API, webhooks have a huge advantage in that if there is a transmission error or business-logic error on the listener, the user will get immediate feedback and can try again.
Read the dedicated webhooks guide for setup, security and a sample signature-verification snippet.